Bleach baths have become one of the most common and reliable ways to get salon-quality hair color from the comfort of your own home, but not everyone knows how to do it properly. This bleach bath guide will help you understand the pros and cons of doing a bleach bath at home, how to make one at home, and what kind of products you need to make sure that your hair color comes out bright and beautiful every time!
Understand the Basics of a Bleach Bath for Hair
A bleach bath, or bleach shampoo as it is sometimes called, is one of the easiest ways to lighten your hair. Bleaching works by opening up each strand of hair so that they take in more dye. It is important to note that a bleach bath will not lighten your hair to a significantly noticeable degree; however, it can be effective if you’re looking for a subtle change.
If you have virgin or unprocessed hair and are looking for something more drastic than simply touching up gray hairs, try getting highlights first. You may also consider using henna on your roots; although unlikely to completely cover any gray hair completely, henna can help make grays look less obvious and leave your hair feeling softer than before.
As with any bleaching treatment, make sure that your shower is well ventilated, or turn on an exhaust fan during application. In addition, remember not to use anything else on your head until you are finished with the bleach bath for hair treatment!
A bleach bath can be done with regular shampoo, but it’s best to use products made specifically for bleaching. Bleach shampoos are usually formulated with additional chemicals that help to lighten your hair faster and give you more control over how much lightening occurs.
When choosing a bleach shampoo, it’s best to look for ones that do not contain conditioners, as these can lessen the overall effects of bleaching by decreasing your strands’ ability to absorb dye. A common ingredient in bleach shampoos is hydrogen peroxide, which helps make hair appear lighter than normal after use. Bleaching should never be attempted without some form of peroxide!
What does it do for your hair?
A bleach bath for hair works because it removes pigment from your hair, and allows you to have a lighter color. By removing darker pigments from your hair, you are making room for more of these lightened tones. In addition, using a bleach bath on your hair regularly will fade any previous bleaching, meaning that you can get brighter and brighter results!
There is also some debate about whether or not bleach baths do as much damage as standard bleaching methods. While neither is ideal for your strands due to their harsh ingredients and can potentially cause dryness and breakage if done too often, doing a bleach bath once in a while seems to be less damaging than traditional bleaching methods.
Is a bleach bath less damaging than standard bleach?
By bleaching your hair regularly, you will find that you don’t need to bleach it as much overall. By removing some of these pigments from your hair, you are lightening them over time and making room for more intense pigment removal.
Traditional bleaching is believed to be harsher on your strands, though you can do some bleach baths between regular bleaching to reduce damage to your hair. They likely also cause less damage since they contain gentler ingredients that make it easier to rinse out and less likely to leave behind damages like dryness or breakage!
Bleach Bath Tips
- Be sure to do your research before trying a bleach bath on your hair. What works for one person may not work for you!
- Start with a small amount of product to test its effect on your hair.
- Don’t leave the bleach on for more than 10 minutes
- Cover your face and wear gloves and goggles to protect yourself from irritation or burns.
- Make sure you rinse thoroughly after using any form of bleach; some people develop rashes when they don’t rinse properly, but rinsing will help prevent damage and breakage as well.
- Note that bleaching can cause excessive dryness, so apply deep conditioners regularly afterward to keep damage at bay (and to lock in moisture).
Why Bleach Bath at Home Instead of at a Salon
When you go to a salon to get your hair bleached, they usually use traditional bleach that contains peroxide. While peroxide-based bleach is strong enough to lift color but not so strong as to damage hair, it can also be drying.
A homemade bleach bath allows you to use less harsh chemicals, which will make your hair feel softer and shinier. Hair that feels better is often healthier, too! And since you’re using less harmful chemicals at home, you won’t have an artificial chemical smell in your hair for days after. This means fewer complaints from family members who don’t like artificially-smelling hair!
How Do You Make a Bleach Bath?
There are actually many different ways to make a bleach bath, and there are three main factors that go into bleach baths: bleach powder, peroxide, and water. The one thing you will need is plastic gloves! They can be purchased from your local dollar store or pharmacy.
The most common ratio for making a successful bleach bath is:
- ¼ Cup of Bleach Powder
- ¼ Cup of Peroxide (alternatively, use a peroxide developer that will be less damaging to your hair than straight peroxide)
- ½ Cup of Shampoo
If you need more product, increase the above amounts at the same rate. However, if you feel like you want more intense effects than simply lightening your hair, then increase any one of these three ingredients depending on how much bleaching power you want.
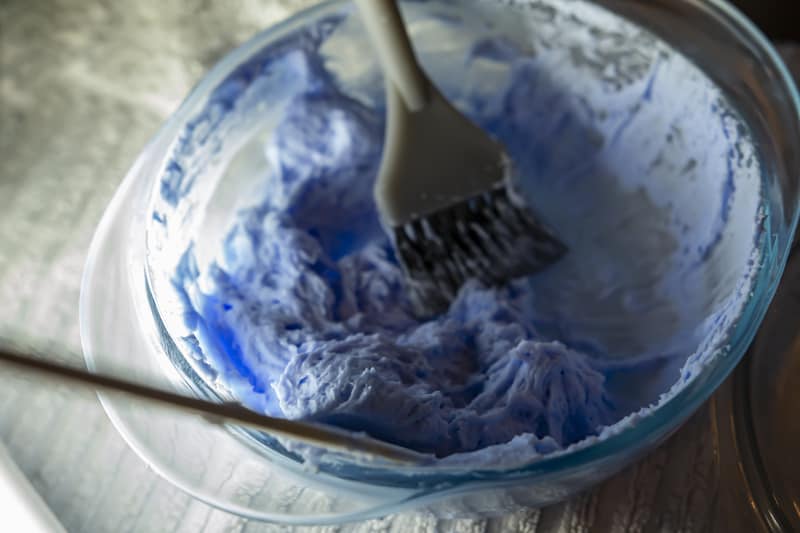
After mixing these ingredients together, you’ll need to have something that you can mix them in. Generally, there are three different things people use for mixing bleach baths: microwavable soup containers, large Tupperware/baking dishes, or the clean bucket that they used to hold their bleach powder.
You will then want to put on your plastic gloves and pour about 1⁄4 cup of bleach into your container before filling it with warm water from your tap until it is around 2⁄3 of the way full. Then, place it in your microwave or oven on low heat and stir regularly until you see that all of your powders have dissolved in order to get a smooth mixture.
Doing A Bleach Bath At Home
- The first step in doing your own bleach bath at home is to gather all of your supplies.
- Create your bleach bath mixture and set aside.
- Wash your hair, preferably with a clarifying shampoo.
- Do not completely dry your hair, you want it to be wet when you add the bleach bath.
- Apply Vasiline to your face, ears, and neck to protect your skin from the bleach.
- Put on some old clothes that you don’t mind getting messed up from the bleach bath.
- Open some windows or make sure you’re in a well ventilated area.
- Using gloves, apply the bleach bath mixture to your hair. Work from the bottom up making sure to massage your scalp when you get to the top.
- Let the product sit for no longer than 10 minutes, then rinse it thoroughly.
- If you are not trying to add color to your hair, make sure you heavily condition it.
Pros/Cons of a Hair Bleach Bath
Although hair bleach baths are less damaging than standard bleach treatments, they can still damage your hair if done incorrectly. Here’s what you need to know:
Pros
- At-home bleach baths are less damaging because they don’t contain peroxide and ammonia, which can damage your hair over time (the same way using traditional bleach on your hair would).
- Can be cheaper to do than going to the salon
- You can better control the strength of the mixture
- Can be done in the comfort of your home!
Cons
- Even though they don’t contain harsh chemicals, these bleaching baths still weaken your hair over time by stripping it of its natural oils.
- Some users also report experiencing fading and breakage after using an at-home bath for several months.
If you’re interested in using bleach baths for your hair, keep in mind that these are meant to be quick treatments (the idea is to give your hair brightness, not to lighten it permanently), so keep that in mind when deciding if they’re right for you.